アプリでA画面からB画面に遷移したいケースは結構あります。コードで記述せざる得ない場合もありますが、StoryboardでSceneを作っているならばSegueで簡単にできます。
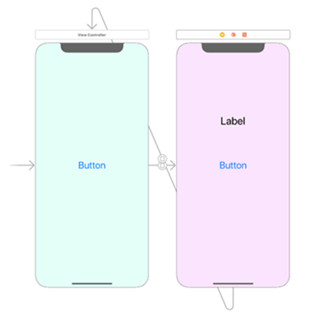
Xcode 11.4
Segue 画面遷移
Segueを簡単に使ってみます。試す内容は以下の2つ
– Segueによる画面遷移
– 画面遷移に合わせてメッセージを送る
また、手順としては
1. 遷移先の ViewController を作成
2. ButtonとViewControllerをSegueで接続
3. 新しい ViewControllerクラスを作成
4. Buttonがタップされ遷移先に文字を送るコーディング
遷移先の ViewController を作成
Single Application を作成
Storyboard に新しく View Controller を作ります
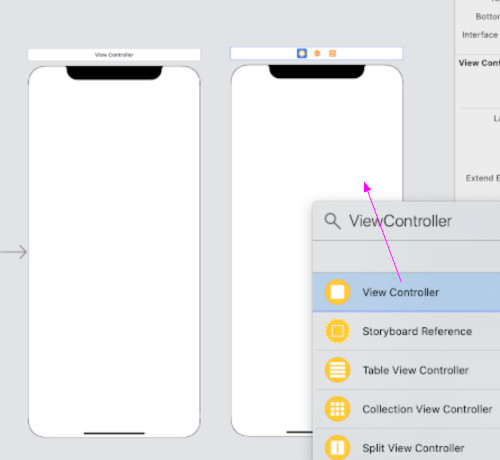
画面遷移をトリガーするためのButtonを置きます。
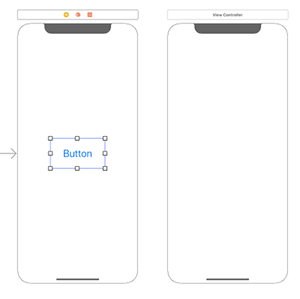
ButtonとView ControllerをSegueで接続
Buttonを右クリックしてactionの+をつかんで遷移先の View Controller に持っていき離します。すると選択肢が現れるので Present Modally を選びます。
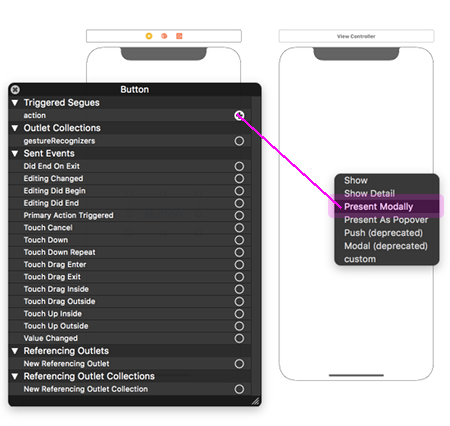
それぞれの選択肢の意味合いは
- Show
UINavigationControllerの画面遷移で画面間に関連性があり「次」「戻る」などに使う。 - Show detail
UISplitViewControllerのケースで、Master viewとDetail viewの画面遷移を表示 - Present modally
現在のviewの上に覆いかぶさるように新しいviewを表示 - Present As Popover
現在の画面の上にポップアップviewを表示
2つの View Controllerの間に Storyboard Segue が現れます。

実は画面遷移だけであれば、このボタンタップのみで行えます。但しデータを遷移先に送るには次の設定が必要になります。
新しい ViewControllerクラス を作成
Segue を選択し、Identifier を「toViewController2」とします。
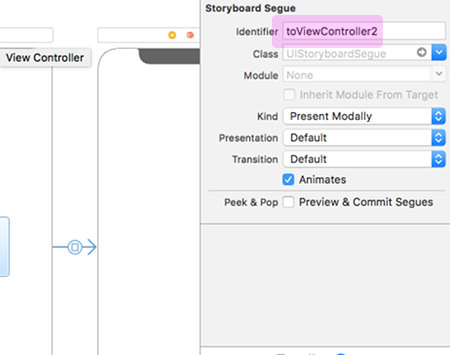
遷移元のView Controller SceneはViewController.swiftでコーディングできますが、新しく作成したView Controller Sceneはswiftファイルが無いのでこれも新しく作ります。
プロジェクトを選択し右クリックで「New File」を選びます。
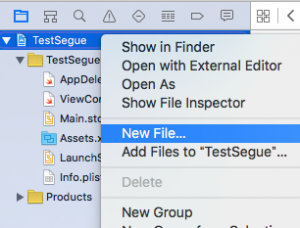
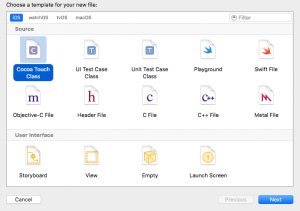
swiftファイルの作成は色々ありますがある程度設定されているもの選ぶと
iOS -> Source->Cocoa Touch Class を選択
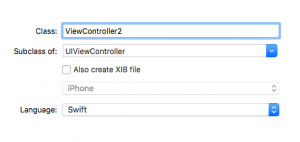
Subclass は UIViewController とし、新しいクラス名を ViewController2 と入力
LanguageはSwiftです
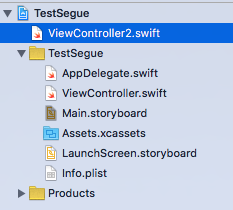
ViewController2 のファイルが出来上がる
これを適当にViewController.swiftの下あたりに移動
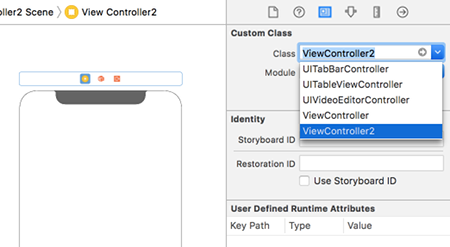
Storyboardで新しく作った View Controller を選択して、Custom Class からこの ViewController2 を選んで関連付けします
Buttonがタップされ遷移先に文字を送るコーディング
– 遷移先のView Controller Sceneに遷移元の文字を受け取り表示させるためのLabelを置きます。
– 遷移元に戻るButtonを作り、Present Modallyで結びます。
– 遷移がわかりやすいように背景色を設定しておきます。
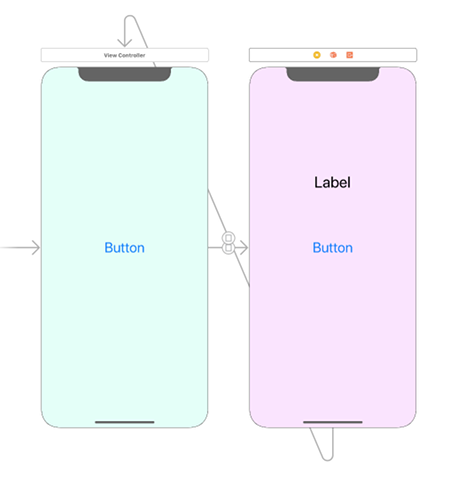
ボタンタップに合わせてSegueのIDを指定してperformSegueを設定します。
|
1 |
performSegue(withIdentifier: "toViewController2",sender: nil) |
prepareで遷移先にあるString変数に文字をセットします。
|
1 2 3 |
let vc2: ViewController2 = (segue.destination as? ViewController2)! // ViewControllerのtextVC2にメッセージを設定 vc2.textVC2 = "to VC2" |
まとめると
ViewController.swift
|
1 2 3 4 5 6 7 8 9 10 11 12 13 14 15 16 17 18 19 20 21 22 23 |
import UIKit class ViewController: UIViewController { override func viewDidLoad() { super.viewDidLoad() } @IBAction func buttonTapped(_ sender : Any) { performSegue(withIdentifier: "toViewController2",sender: nil) } // Segue 準備 override func prepare(for segue: UIStoryboardSegue, sender: Any?) { if (segue.identifier == "toViewController2") { let vc2: ViewController2 = (segue.destination as? ViewController2)! // ViewControllerのtextVC2にメッセージを設定 vc2.textVC2 = "to VC2" } } } |
遷移先
ViewController2.swift
|
1 2 3 4 5 6 7 8 9 10 11 12 13 14 15 16 |
import UIKit class ViewController2: UIViewController { @IBOutlet var label:UILabel! var textVC2:String? override func viewDidLoad() { super.viewDidLoad() label.text = textVC2 } } |
Storyboardのボタンとラベルをコードと紐づけします。
ViewController2に配置したButtonは戻るだけなのでIDはつけなくても遷移できます。
Build 実行
Buildして実行、タップすると画面遷移して”to VC2″が表示されれば成功です。
Reference:
Using Segues – Apple Developer