今までのSDKのみでAdMobを設定する方法です。FirebaseでのAdMobをGoogleは推奨していますが、古いSDKのみの方法も残っています。また、Appleの
Xcode 12.4
AdMob SDK の導入
最新のSDKをダウンロードします。
以前からのSDKによる設定を実装してみます。色々GoogleMobileAds SDKと言っても微妙にFirebaseに絡んだものもありますが、古いiOSは今までの方法を周到するしかありません。(SDKバージョンは随時アップされます)
1. GoogleMobileAds SDKのダウンロード
1.1 SDKをダウンロードしてプロジェクトに追加
1.2 -ObjC リンカーフラッグを追加
1.3 GADIsAdManagerApp
1.4 GADApplicationIdentifier
1.5 SKAdNetworkIdentifier
1.6 CocoaPodsを使う(Option)
2. サンプルコード
3. 広告ユニット ID
GoogleMobileAds SDKのダウンロード
SDKをダウンロードせずにCocoaPodsを使うこともできますが、CocoaPodsがうまく使えないのであえてSDKでという理由もあると思いますのでダウンロードで設定します。
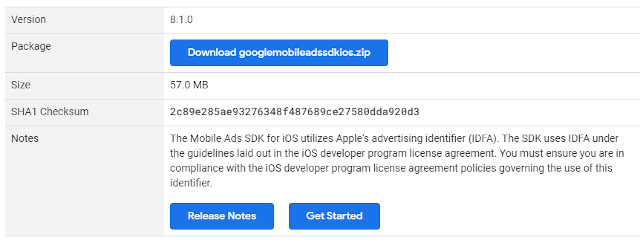
*バージョンは逐次変わります
SDKをダウンロードしてプロジェクトに追加
ダウンロードして解凍、frameworkがいくつかあります。
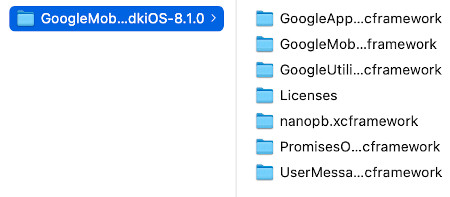
「Add Files to “project”…」を使ってこれをプロジェクトに追加します。
注意としてはファイルをコピーしてプロジェクトフォルダ内に持ってくること。
「Copy items if needed」
これを忘れると後で面倒なことになります。
–ObjC リンカー フラッグを追加
「TARGETS」「Build Settings」検索で「other linker」を探し
「-ObjC」 を記述

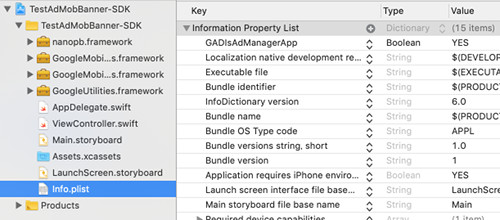
GADIsAdManagerApp
Info.plist にGADIsAdManagerAppの項目を追加してYESに設定します。
|
1 2 |
<key>GADIsAdManagerApp</key> <true/> |
GADApplicationIdentifier
アプリIDをInfo.plistに追加
テスト用ID:ca-app-pub-3940256099942544~1458002511
|
1 2 |
<key>GADApplicationIdentifier</key> <string>ca-app-pub-3940256099942544~1458002511</string> |
SKAdNetworkIdentifier
iOS14からはIDFAを利用する場合はユーザー許可が必要になりました。
SKAdNetworkはAppleの広告ネットワークでこれに対応させます。
Google の SKAdNetworkIdentifier の値として cstr6suwn9.skadnetwork を含む SKAdNetworkItems キーをInfo.plistに追加
|
1 2 3 4 5 6 7 |
<key>SKAdNetworkItems</key> <array> <dict> <key>SKAdNetworkIdentifier</key> <string>cstr6suwn9.skadnetwork</string> </dict> </array> |
CocoaPodsを使う(Option)
今までのSDKをダウンロードする代わりにCocoaPodsを使う方法です。
上記ダウンロードでのframeworkが済んでいれば必要ありません。
推奨なのですが説明があまりありませんので、この辺りハマると結構面倒ですのでやめたほうがいいかもしれません(元々CocoaPodsが使える環境であれば問題ないのですが)
pod install:
ターミナルでprojectの .xcodeproj があるレベルに入ります。
linuxの”cd”や”ls”などのコマンドを使います。
podをinitするとPodfileが作成されます。Finderでプロジェクトを見てください。
|
1 |
$ pod init |
作成されたPodfileファイルをエディターで開いて以下のように
pod ‘Google-Mobile-Ads-SDK’ を追加します。
targetはあなたのプロジェクト名です
|
1 2 3 4 5 6 7 8 |
# Uncomment the next line to define a global platform for your project platform :ios, '10.0' target '[プロジェクト名]' do use_frameworks! pod 'Google-Mobile-Ads-SDK' end |
これでpod installします
|
1 |
pod install --repo-update |
Pod installation complete!
となれば成功です。
以降は.xcworkspaceを叩いて起動
サンプルコード
AppDelegate で startWithCompletionHandler: メソッドを呼び出します。
AppDelegate.swift
|
1 2 3 4 5 6 7 8 9 10 11 12 13 14 15 16 17 18 19 20 21 22 23 24 25 26 27 |
import UIKit import GoogleMobileAds @main class AppDelegate: UIResponder, UIApplicationDelegate { func application(_ application: UIApplication, didFinishLaunchingWithOptions launchOptions: [UIApplication.LaunchOptionsKey: Any]?) -> Bool { // Initialize Google Mobile Ads SDK GADMobileAds.sharedInstance().start(completionHandler: nil) return true } // MARK: UISceneSession Lifecycle func application(_ application: UIApplication, configurationForConnecting connectingSceneSession: UISceneSession, options: UIScene.ConnectionOptions) -> UISceneConfiguration { // Called when a new scene session is being created. // Use this method to select a configuration to create the new scene with. return UISceneConfiguration(name: "Default Configuration", sessionRole: connectingSceneSession.role) } func application(_ application: UIApplication, didDiscardSceneSessions sceneSessions: Set<UISceneSession>) { // Called when the user discards a scene session. // If any sessions were discarded while the application was not running, this will be called shortly after application:didFinishLaunchingWithOptions. // Use this method to release any resources that were specific to the discarded scenes, as they will not return. } } |
GADBannerViewDelegate で delegate を設定
GoogleMobileAds を import します
ViewController.swift
|
1 2 3 4 5 6 7 8 9 10 11 12 13 14 15 16 17 18 19 20 21 22 23 24 25 26 27 28 29 30 31 32 33 34 35 36 37 38 39 40 41 42 43 44 |
import GoogleMobileAds import UIKit class ViewController: UIViewController , GADBannerViewDelegate { var bannerView: GADBannerView! override func viewDidLoad() { super.viewDidLoad() // In this case, we instantiate the banner with desired ad size. bannerView = GADBannerView(adSize: kGADAdSizeBanner) bannerView.adUnitID = "ca-app-pub-3940256099942544/2934735716" bannerView.rootViewController = self bannerView.load(GADRequest()) bannerView.delegate = self addBannerViewToView(bannerView) } func addBannerViewToView(_ bannerView: GADBannerView) { bannerView.translatesAutoresizingMaskIntoConstraints = false view.addSubview(bannerView) view.addConstraints( [NSLayoutConstraint(item: bannerView, attribute: .bottom, relatedBy: .equal, toItem: bottomLayoutGuide, attribute: .top, multiplier: 1, constant: 0), NSLayoutConstraint(item: bannerView, attribute: .centerX, relatedBy: .equal, toItem: view, attribute: .centerX, multiplier: 1, constant: 0) ]) } } |
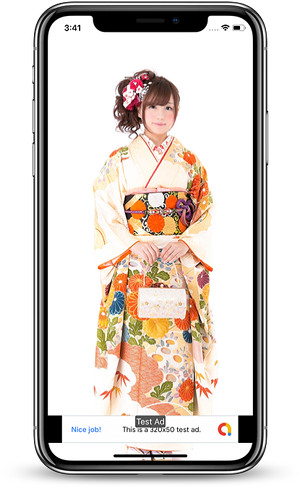
これでコードを実行すると「Test Ad」のテスト広告が表示されます。
(個人的な好みで画像を入れました)

AdMobを画面上に貼ることもできます。
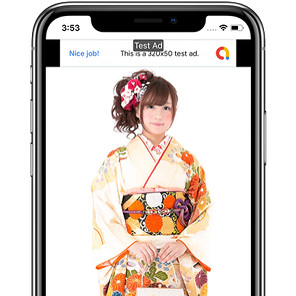
広告の位置は決め打ちでやりましたが、実際はsafeareaや画面の回転も考慮する必要があります。
広告ユニット ID
AdMobに登録が済んでいない場合は申し込みをします。
AdMob に申し込む
広告ユニット ID は、AdMob で作成される各広告ユニットに割り当てられる一意の ID 番号で、バナー広告、インターステーシャル広告などアプリ内の広告を識別するためのものです。
広告ユニット ID の確認
から AdMob アカウントにログイン
サイドバーで [アプリ] をクリックします。
再びサイドバーで「広告ユニット」のアイコンをクリックすると広告ユニットのIDの一覧が表示されます。
ca-app-pub-9999999999999/99999999 のように「/」があるIDです。
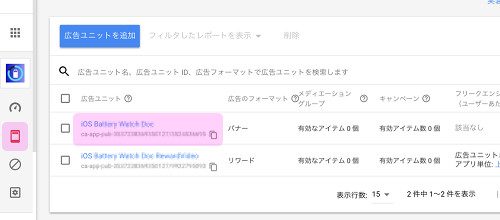
AdMob広告を自分でクリックするのは違反ですがそれ以外にもテストで本番広告を表示するのがよくないと思われる理由です。
広告がクリックされたかどうかはコンソールで確認できます。
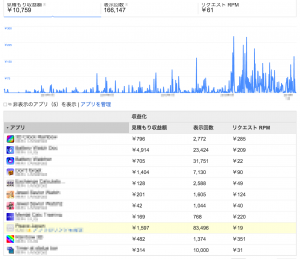
これはAdMobのケースですが
見積もり収益額、表示回数、リクエストRPMと出ています
RPMは、表示回数 1,000 回あたりの見積もり収益額を表します。
この他にもCPCやCTRがあります。
CTR = (広告がクリックされた回数/表示された回数)
テストモードでなく本ちゃんで表示させることは、いたずらに表示回数を増やすことになります
見積もり収益額とあるのは、広告に対して無効なクリックがあった場合に
月末にまとめて収益額を差し引くために、「見積もり」とあります
見積もり額から無効クリックの収益を引き算したものが、未払い収益の確定額となります。月末にまとめているのは、何が無効クリックとしているか悟られないためでしょうね
また、Googleは広告をクリックした後のユーザーの動きをトレースしており、その後のアクションまで把握しているそうです。
クリックの品質を判断しCVR(成約率)の低いアカウントの報酬を下げる仕組みがあるらしいですので、間違ってクリックされやすい場所に広告を貼ることはお勧めできません。
また、本人や友達に依頼してクリックしたりすると、偽装とみなされる可能性があります
注意点として、
「推奨:AdMob アカウントを作成して、アプリを登録していること」と
スタートガイド – Google AdMobにはあります。
つまり始めてのアプリではこのテスト広告は実機で表示されないのかもしれません(推奨というのが必須ではないのですが)
既に登録されているIDを使って別のアプリのテストはできることはできます。
関連ページ:
- Firebase
- Google Mobile Ads SDK
- Firebaseを使わないでAdMobをアプリに貼る
- Interstitial広告の設置
References:
Get Started
Banner Ads
