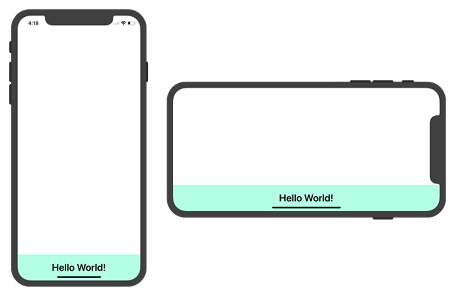
UILabelをダイナミックに動かしたい場合がありますが、全てコードで記述してしまえば可能です。例えば画面が縦、横に回転したときに表示する文字をちょうどいい場所に置きたい場合に有効です。これはバナー広告を常に下に表示させたい場合などに使えます。
CGRect UILabel 位置調整
storyboardを使わずに動的に調整します。
UILabelの位置・大きさを適宜決めるため画面サイズに最適な大きさと縦横を計算する必要があります。
また、iPhone X系 の場合は SafeAreaの考慮 も必要です。
CGRect と frame
CGRectとframeを使います。
- CGRectとframeで先頭位置とサイズ
- label.frame = CGRect( x:15, y:20, width:160, height:15 )
- 例えば、(15, 20)の座標から横160、高さ15の矩形エリアをframeとして設定
- view.frame.size.height で画面の高さを検出
-
viewDidAppear を使って画面回転を検知
- その他として、ラベルのフォント、色設定等を実施
CGRect で先頭位置とサイズを決めラベルの frame に入れる
その後、テキスト内容を代入してから view に追加することで位置は決められます
|
1 2 3 4 5 6 7 8 9 10 11 |
// ラベルのインスタンス生成 let testLabel = UILabel() // ラベルのサイズを設定 testLabel.frame = CGRect(x:15, y:20, width:160, height:15) // ラベルの文字を設定 testLabel.text = "Hello World" // Viewにラベルを追加 self.view.addSubview(testLabel) |
スクリーンの横幅と高さ
view.frame.sizeを使ってスクリーンの横幅と高さを求めます。
|
1 2 |
let screenWidth:CGFloat = view.frame.size.width let screenHeight:CGFloat = view.frame.size.height |
画面回転後の表示サイズ
viewDidAppear()を使って画面の回転後の表示サイズを取得します。
iOS8以降は回転時の画面の高さと幅は、実際回転した画面の高さと幅となったようです
このケースでは、portrait, landscape の状態を取得する必要なくなりました
ただ、回転したことにより位置調整はしますので画面が変わったら位置を再設定させるようにします。
|
1 2 3 4 5 6 7 8 9 10 11 |
override func viewDidAppear(_ animated: Bool) { NotificationCenter.default.addObserver(self, selector: #selector(self.rotationChange(notification:)), name: UIDevice.orientationDidChangeNotification, object: nil) } @objc func rotationChange(notification: NSNotification){ // ラベルを再設定 } |
を使います。またこれは画面変更で毎回呼ばれます。
サンプルコード
コードをまとめると
ViewController.swift
|
1 2 3 4 5 6 7 8 9 10 11 12 13 14 15 16 17 18 19 20 21 22 23 24 25 26 27 28 29 30 31 32 33 34 35 36 37 38 39 40 41 42 43 44 45 46 47 48 49 50 51 52 53 54 |
import UIKit class ViewController: UIViewController { // ラベルのインスタンス生成 let testLabel = UILabel() override func viewDidLoad() { super.viewDidLoad() setLabel() } // 回転を検知 override func viewDidAppear(_ animated: Bool) { NotificationCenter.default.addObserver(self, selector: #selector(self.rotationChange(notification:)), name:UIDevice.orientationDidChangeNotification, object: nil) } @objc func rotationChange(notification: NSNotification){ setLabel() } func setLabel(){ let screenWidth:CGFloat = view.frame.size.width let screenHeight:CGFloat = view.frame.size.height // ラベルのサイズを設定 testLabel.frame = CGRect(x:0, y:screenHeight-80, width:screenWidth, height:80); // ラベルの文字を設定 testLabel.text = "Hello World!" // ラベルの色を黒に設定 testLabel.textColor = UIColor.black // ラベルのフォントを設定 testLabel.font = UIFont.boldSystemFont(ofSize: 30) // わかりやすくするため背景色を入れます testLabel.backgroundColor = UIColor(red: 0.7, green: 1.0, blue: 0.9, alpha: 1.0) // テキスト中央寄せ testLabel.textAlignment = NSTextAlignment.center // Viewにラベルを追加 self.view.addSubview(testLabel) } } |
この方法では、
– Portrait
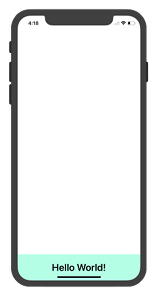
– landscape Right
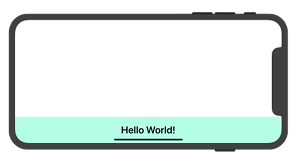
– landscape Left
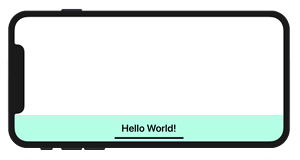
は可能ですが
– Upside Down
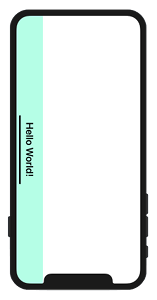
ではうまく機能しません
これをするにはMask設定等々が必要になります。あまり使うこともないと思いますので、ここでは煩雑になるので扱いません。
関連ページ:
References:
UILabel – UIKit | Apple Developer Documentation
UIFont – UIKit | Apple Developer Documentation
UIColor – UIKit | Apple Developer Documentation
frame – UIView | Apple Developer Documentation