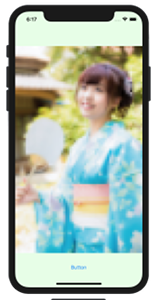
アニメーションは処理が重いのですがCABasicAnimationを使うと比較的スムーズな動きを出せます。こちらで画像のモザイクを試しましたが、それを動画にしてみましょう。

CABasicAnimation
CALayer の CA は Core Animationのことでアニメーションの画像処理系の重い処理に適しています。またUIViewと被っているような気もするのですが、その差は
CALayer
‘An object that manages image-based content and allows you to perform animations on that content’
アニメーション的な処理はこちらが使いやすいということのようです
UIView
‘An object that manages the content for a rectangular area on the screen.’
描画する領域について色々定義しているということでしょうか
モザイク画からフェードインするような演出を作ります。
rasterizationScale をキーにして CABasicAnimation のインスタンスを生成
duration でアニメーション期間を設定して、その間の開始と終了時のキー値を入れます。
imgView.layer に追加する
コードは以下のようになります。
ViewController.swift
|
1 2 3 4 5 6 7 8 9 10 11 12 13 14 15 16 17 18 19 20 21 22 23 24 25 26 27 28 29 30 31 32 33 34 35 36 37 38 39 40 41 42 43 44 45 46 47 48 49 50 51 52 53 54 55 56 57 58 59 60 61 62 63 64 65 66 67 68 |
import UIKit class ViewController: UIViewController { var imgView = UIImageView() override func viewDidLoad() { super.viewDidLoad() // 画面背景色を設定してみました self.view.backgroundColor = UIColor(red:0.9,green:1.0,blue:0.9,alpha:1.0) let img = UIImage(named: "sample")! imgView = UIImageView(image: img) // 画像のサイズ let iWidth = img.size.width let iHeight = img.size.height // スクリーンサイズ let screenWidth = self.view.bounds.size.width let screenHeight = self.view.bounds.size.height let scale = screenWidth/iWidth // 画像サイズ変更 let rect = CGRect(x: CGFloat(0), y: CGFloat(0), width: iWidth*scale, height: iHeight*scale) // ImageView frame をCGRectMakeで作った矩形に合わせる imgView.frame = rect // 画像をセンターに合わせる imgView.center = CGPoint(x: screenWidth/2, y: screenHeight/2) } @IBAction func buttonTapped(_ sender : Any) { rasterizationAnimation() } func rasterizationAnimation(){ imgView.layer.shouldRasterize = true imgView.layer.rasterizationScale = 0.1 imgView.layer.minificationFilter = CALayerContentsFilter.trilinear imgView.layer.magnificationFilter = CALayerContentsFilter.nearest let testAnimation = CABasicAnimation(keyPath: "rasterizationScale") // rasterizationScale を 0.01から1.0まで testAnimation.fromValue = 0.01 testAnimation.toValue = 1.0 // 期間(秒) testAnimation.duration = 10.0 // このアニメーション結果を残す testAnimation.isRemovedOnCompletion = false testAnimation.fillMode = CAMediaTimingFillMode.forwards // アニメーションの追加 imgView.layer.add(testAnimation, forKey: "testAnimation") // UIImageViewのインスタンスをビューに追加 self.view.addSubview(imgView) } } |
あとは画像を選んでAssets.xcassetsに入れます。
(例:sample@2x.jpg)

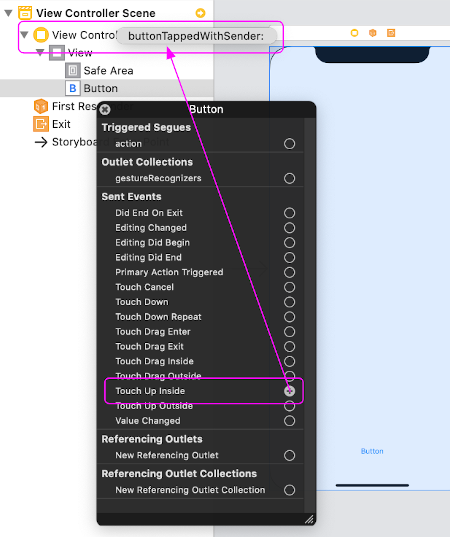
ButtonをStoryboardに置いてコードと紐付けします。

Swiftのいつの頃からか、QuartzCore.framewarkを入れなくてもできるようになりましたね
画像のちょっとしたアレンジができそうです。
関連ページ:
- UIImageView の設定(コードで記述
- ストーリーボードを使った画像 UIImageView の設定
- 画像の拡大縮小 (CGRect)
- CGAffineTransform:画像を回転、移動、反転
- アニメーション(パラパラマンガ)
- Image, Text の合成
- 画像をドラッグさせる
- UIImage の使い方
- 画像をぼかす、モザイク化する
- CABasicAnimationを使たアニメーション
- cornerRadiusを使って画像を角丸にする
References:
CABasicAnimation – Core Animation | Apple Developer Documentation
UIImageView – UIKit | Apple Developer Documentation
UIImage – UIKit | Apple Developer Documentation